First and foremost - you're not going to turn your laptop into a 1080p 3d theater using this process!
Because this process directs odd pixels to the right eye and even pixels to the left eye, your horizontal resolution is halved.
My screen has a resolution of 1440x900, so I'll get 720x900 - that's about DVD quality in 3D!
This involves printing a lenticular barrier on a transparency sheet and placing it over your laptop screen.
A lenticular barrier is a repeating pattern of thin vertical lines that directs odd pixels to the left eye and even pixels to the right eye.
By combining two photos or videos by interleaving them, you would have all you need to see 3D.
Youtube 3D already allows you to play 3D videos this way, so you've got something to test with.
I took a look at the
parallax barrier documentation in Wikipedia and realized that it was a bit short on maths, so here goes.
Some constants
--------------
d : distance to viewer. This depends on ones preference and I've chosen 560mm.
e : distance between eyes (pupil centres).
Mine is 63 mm, measured with a tape measure and a mirror.
p : pixel width/height. For Compaq A945EM, this is 0.259mm from the docs.
Calculated variables
g : grill distance, the distance seperating the pixels from the grill.
Note that Hp/Compaq's own docs don't give the thickness of the screen cover,
so trial and error is required here. Use clear acetate sheets or transparancy sheets between the printed barrier and the display.
g = p * d / e
h : the grill line/space width. It's p but scaled down by d/(g+d)
h = p * d / (g + d)
expanding g,
h = p * d / ((p * d / e) + d)
swapping p and d,
h = p * d / ((d * p / e) + d)
inverting division,
h = p * d * 1/((d * p / e) + d)
inverting multiplication,
h = p * d * 1/((d / (e / p)) + d)
setting a common divisor,
h = p * d * 1/((d / (e / p)) + d(e/p)/(e/p))
sharing divisor,
h = p * d * 1/((d + d(e/p))/ (e / p))
inverting divisor,
h = p * d * (e / p)/(d + d(e/p))
dividing by d
h = p * d * ((e / p)/d) / (1 + e/p)
shuffling,
h = p * d/d * (e / p) / (1 + e/p)
shuffling,
h = e / (1 + e/p)
or, multiplying above and below by p,
h = p * e / (p + e)
Yes, that's right - the line-space widths of the barrier depends only on the distance between your eyes and the size of the display pixels.
If you want to view it from further away, add some clear acetate sheets between the barrier and the display.
r : the printer resolution in pixels per millimetre
r': the inverse of r: the size of each printer pixel
x : the number of printer pixels per line/space(h)
x = h / r'
x = h * r
From the above constants,
g = p(0.259) * d(560) / e(63)
g = p * d(145.04) / e(63)
g = 2.3022222
h = p(0.259) * d(560) / (g(2.3022222) + d(560))
h = p * d(145.04) / (g + d(562.3022222))
h = 0.25793958
or
h = e/(1 + e/p)
h = 0.25793958
or
h = p * e / (p + e)
h = 0.259 * 63 / (0.259 + 63)
h = 0.259 * 63 / 63.259
h = 0.25793958
Printer res (r)
(in) (mm) x
300 11.811024 3.0465306
600 23.622047 6.0930609
1200 47.244094 12.186122
You might think 3.0465306, that's about 3. Can't I just print lines 3 printer pixels wide spaced apart by 3 pixels?
Well the problem is that this small term causes a left-right reversal error when the error terms add up to 3.
So your image will go to the wrong eye about every (3 / 0.0465306) or 65 lines.
Significant.
So 1200 dpi is the minimum I think is needed for it to work.
Obviously the printer can only print whole pixels so you round up the error term when calculating filled pixels and round down when calculating spaces, so the wrong pixels are always blocked, at the expense of sometimes blocking parts of good pixels.
just to let you know what a "pixel" looks like, I took a picture
I think it should be possible to craft an image with the first row having the line/space pixels, repeating that row all the way down the image.
The really tricky part is getting the printer to stay out of the way and just print it as is.
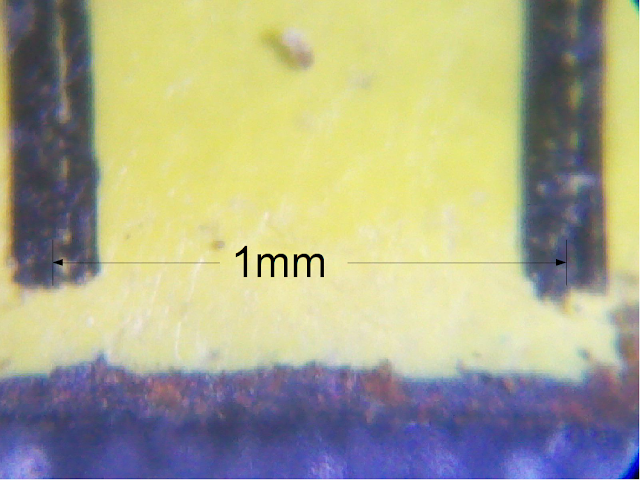
I took the following images using a pocket microscope set to 100x and photographed with my mobile phone set to 2.8x - tricky at best.
Firstly, 1mm
Next, some display pixels at the same scale.
Finally, I printed a "swatch" of different spacings. Below is subjectively the one that worked best for me.
I put two clear acetate sheets between the screen and the filter with the filter print side closest to the screen.
I printed this with my Canon Pixma MP560 which claims a 9600x1200 dpi print resolution. It looks a bit noisy and blotchy.
As I printed horizontal lines running down the page, I had 1200dpi to work with, so I had to stagger the line/space widths to average to the required value.
More in part II.


